Showing posts with label Laundry Room. Show all posts

Friday, December 27, 2013

Surprise Christmas Makeover

Since yesterday I shared everything that went down for Christmas, I thought I'd share a Christmas gift that we gave to my sister a little early - a surprise laundry room makeover. We had been planning it for a while, and it was hard to keep it a secret. But I'm excited that I can finally spill the beans on how it all went down.


My sister and her husband bought their home about 3 years ago, but haven't really done any major upgrades to it since they moved in. It was was what you could call "builder basic." My sister added photos and artwork to the walls, but beyond that didn't really personalize the house. She has always talked about wanting to paint, but was too intimidated by the large ceilings and the color-picking process. I've told her for the past year or so to give me an idea of what she wants and I'd help her pick everyone out. I'd even volunteer my husband to do all the labor. But, nothing every really went further than that. Until a couple months ago that is.

Dan and I were visiting with my parents one weekend and got talking about Christmas and what were were thinking about getting for my sister's kids. Somehow the conversation transitioned to what we wanted to get my sister and her husband. I brought up the idea of buying her a gallon of paint for Christmas. Then, the idea snowballed into all of us chipping in and doing a whole room  makeover. And once my mom gets an idea in her head, it's hard for her to stop rolling with it.

So, when my sister and her husband came over later that day, I pulled my brother-in-law aside and told him about our idea. He loved it! I asked him which room in the house he thought they could benefit the most from a makeover. Laundry room. No hesitation. Main problem? Shoe organization.

You see, my sister and her family rarely use the front door to enter their home; they always use the garage door. Immediately through the garage door is their first floor half bath to the left and the laundry room to the right. The area in between was affectionately dubbed "The Dumping Ground." Maybe you have one of those. Backpacks.... Shoes... you name it, it was dropped. They had done their best to corral the shoes into large Tupperware bins, but it wasn't effective. And my brother-in-law was tired of tripping over shoes. For a man with only 3 pairs of shoes, he couldn't understand why it was so hard to put shoes away. And the shoes were making it difficult to get into the laundry room and sort laundry. So the laundry room it was.

Anyways, with his approval of the gift and the room chosen we turned to (what else?) Pinterest for ideas. I created a secret board and added my mom to it so that we could share ideas. While my mom distracted my sister, I went through all of the laundry room photos I had already pinned with her husband to see what he had in mind (like this, this, this, and this) and repinned those to the secret board.

My mom even got my sister onto the topic of painting her living room and asked her what colors she was considering. She said she wanted a blue color, then pointed to these earrings on the kitchen counter and said, "like this."


Crazy enough, those earrings were pretty darn close to the color I picked for my classroom last summer. To be honest, I was surprised by her choice considering most of the decor in her home is dark rather than bright. But, if we were going to paint any room a bright, cheery color, it would be the laundry room. 

Then my sister mentioned her favorite flower: tulips. I don't think she's met a tulip she didn't like. Red and yellow tulips are her color of choice. So, we ran with the idea of painting the walls blue and adding pops of red and yellow in the room.

With a color scheme in mind, the next step was to figure out how to accommodate all of the shoes while maintaining the functionality of the room. We knew it would require some piece of furniture, but we weren't sure of how large a piece the room would accommodate. So, we planned a secret trip out to my sister's house after school one day so that we could get in there, snap some before pictures, get measurements of the room, and get out of there before she got off of work. The only potential problem would be if my niece or nephew spilled the beans about our little trip.


With measurements in hand, pictures on our phones, and the added challenge from my brother-in-law to find a place for all the detergent bottles besides the top of the dryer, Dan and I planned a trip to Ikea with my mom. We looked at all of the possible storage options throughout the store and (three hours later....) decided that we liked the Pax wardrobe best. It made the most sense for what we were looking for: tall, fit into the space, allowed for deep storage and had changeable shelving and drawer options to choose from. The wired, pull out drawers would be perfect for storing all of their shoes. Not to mention, they were large enough for each member of the family to have their own basket. So we took pictures and wrote down the prices of all the components that we needed and got ready to leave Ikea.

But, if you know me at all, you know I can't leave a store without stopping by the clearance section first (my mother taught me well!). So of course I had to stop by the "as-is" section of Ikea near the registers. And wouldn't you know? They had the Pax wardrobes in the exact size that we needed marked down more than 50% off - still in the box! They had 7 of them left. But there was a little problem. We had driven down in my little Kia not anticipating buying anything. We'd have to wait until the next morning to borrow my stepdad's truck. Luckily, when we went back, there were still plenty of wardrobes to choose from. When we went back, we picked up the baskets for the shoes. The store was out of selves, so a few weeks later, I found some in the "as-is" section that were slightly off-colored and picked those up instead. Honestly, now that it's all been installed, you don't even notice the difference in color.

Now that we had the main piece of furniture to add functionality and storage, it was time to look for accessories. Remember how we were hoping to add pops of red and yellow to this room? Well, we found these awesome red floating shelves at Ikea when we were looking around and decided we wanted to add two of them to the room opposite the washer and dryer. Mom found a cute tulip canvas print. We played around with the idea of spray painting some frames yellow and hanging those up.


All that was left was to hurry up and wait. Mom and I both asked for the day off of work. Dan was already scheduled to be off. All we had to do was keep our fingers crossed and pray that neither my sister or her kids would get sick on the day we were planning to do the makeover.

The morning of the makeover, Dan and I were running behind schedule. So mom got there first and started unloading the laundry room and pulling the washer and dryer into the middle of the room. Dan helped unload the furniture from the pickup truck. And I worked on priming over the dark scuff marks around the walls. Since the paint we had bought was paint+primer, we decided to only prime over the darker areas on the wall. Then, we cracked open the paint. Dan got the high spots, I started cutting in, and mom rolled everywhere else.


Luckily, it only took one coat of paint to cover the entire room. We used a small brush to do minor touch-ups where needed. By the way, the color we used was Sunken Pool from the Martha Stewart line at Home Depot.

While the paint dried, my mom ran home to eat lunch and pick up the shoe baskets that she had left behind. Dan and I worked on getting the wardrobe assembled before we headed out to grab some food. Once we were all back together and had full bellies, we decided it was best to disassemble the wardrobe and assemble it inside of the laundry room.


See all that space between the washer and the window? Well, the initial plan was to shift both the washer and the dryer (their units are reversed) closer to the window and place the wardrobe between the dryer and the wall. Problem? The dryer hose was too short. Although that was easily fixed by a trip to WalMart, our next problem was that the dryer vent prevented the wardrobe from being placed flush against the wall and therefore, would prevent us from anchoring it.

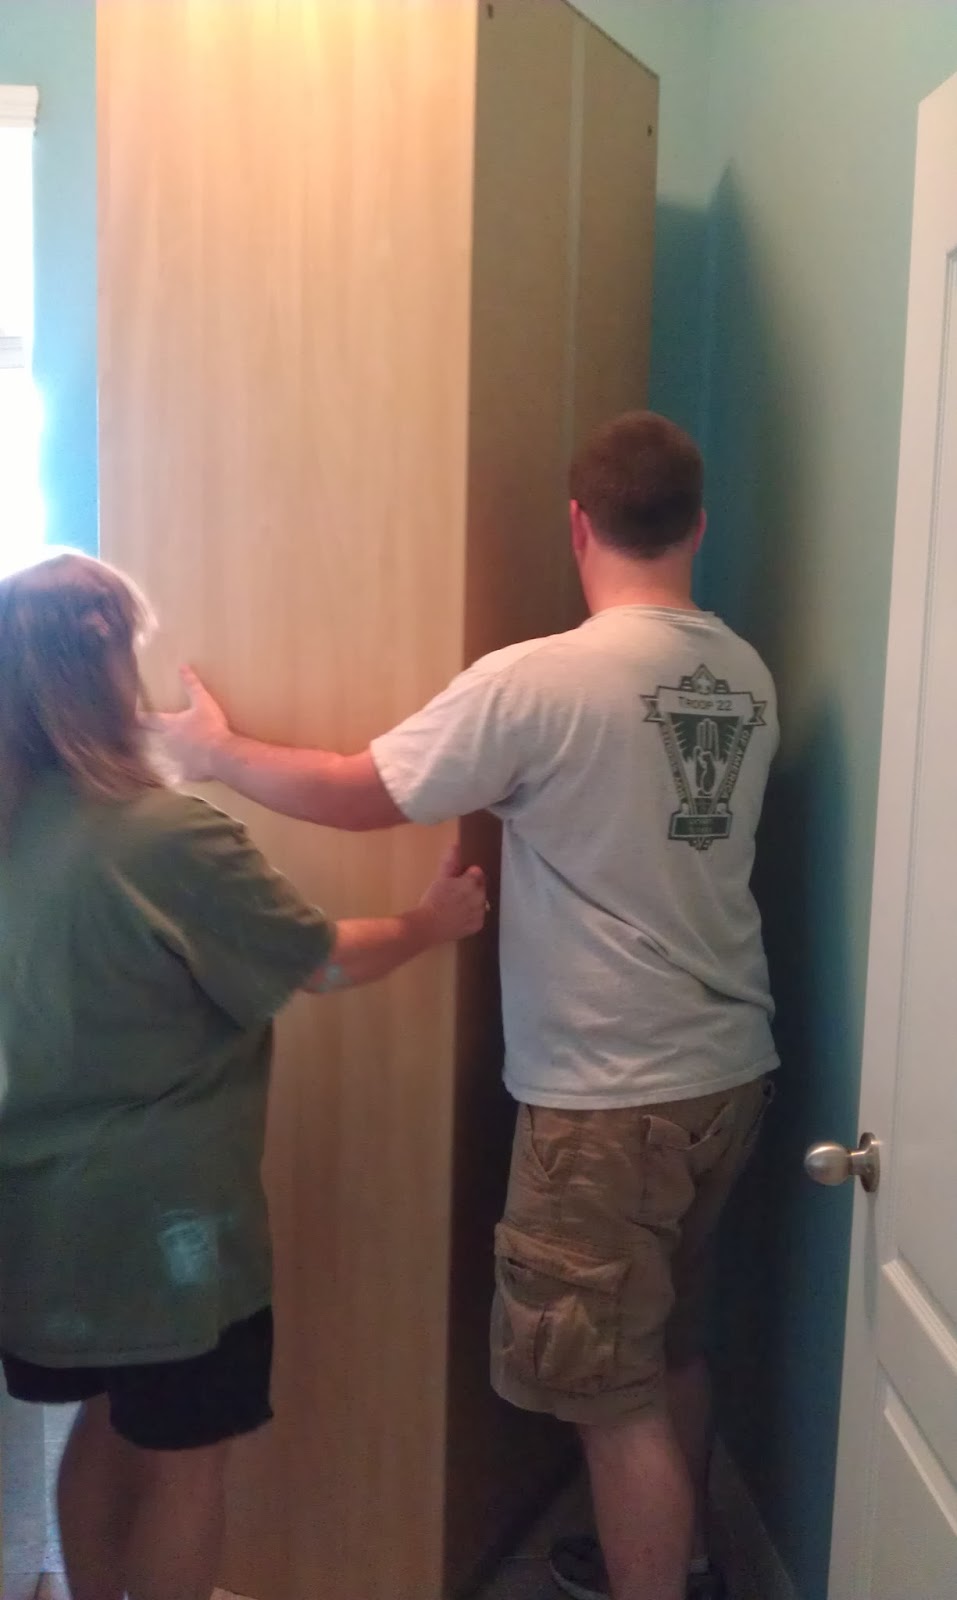
Once I get an idea into my head, it's hard for me to let it go. I sat in that room and brainstormed how to make it all work. Because, honestly, the wardrobe against the window wall made the room feel even smaller than it did with the piles of shoes in it. Eventually, I convinced Dan that we could anchor some wood to the wall, and then the wardrobe to the wood. But, we didn't have time to do all the anchoring before my sister got home. We'd only have enough time to cut off a piece of the wire shelving above the washer and dryer and shimmy the wardrobe into place. No big deal - we could come back that weekend and fix it, right?

So, after making a quick trip to my in-laws to pick up a hack saw and my mom ran home to pick up my stepdad, we started running around like chickens with their heads cut off getting all the last minute things into place before my sister arrived home.


My niece and nephew helped with getting all the shoes into their new homes while I worked on hiding the tools and paint in the bathroom.

Here's the finished room:


The blue baskets were originally in the laundry room. We just organized what was in them and returned them to the shelf above the washer and dryer.


I shopped around her house for stuff to place on the shelves to that they weren't empty. My mom found the Christmas decorations and hung those up in the room.


You can see how tall the Pax wardrobe is. Although I bought three shelves for the unit, we only installed two. The first shelf holds all of the detergents, bleach, and fabric softeners, and the second shelf holds one of the Tupperware bins that previously held shoes. Now, it holds winter blankets and other seasonal things. There's even enough room on top of the wardrobe for another Tupperware bin. They even have the option of moving both bins to the top and installing that third shelf for even more storage.

My sister was completely surprised! Even all the panicked phone calls and text messages from her husband wondering when she was going to be home didn't tip her off.


Sorry for the really blurry photo.... but you can tell how happy she was (and how much of a ham my niece is). That yellow thing that she's holding was the only thing that we didn't have time to hang. It will eventually go below the red shelves and hold the kids' book bags.

I'm really glad that my sister loved what we did to her laundry room. She's even talking about having us come in and do another room for her. Don't have to ask us twice!

Wednesday, October 2, 2013

Removing Gum from a Dryer

Two weekends ago, as I was taking clothes out of the dryer, I realized that a couple shirts had some sticky substance on them. Although I knew in my heart what it meant, I didn't want to think about the implications of it....

You see, Dan is an EMT. And as such, he wears these pants that have a million and one pockets. Why does he need so many pockets? I'm not sure I'll ever know the answer.... Anyways, I guess Dan didn't check all of his pockets before he loaded up the washing machine. And of course I didn't notice anything out of the ordinary when I was transferring all the clothes over to the dryer. But, heat does wonders to a pack of gum hidden in pockets....

Yep. That happened. In our brand new dryer.


(Sorry for the blurry pics. These were taken on my cell phone pretty late at night.)

I tried my best to keep calm. It was only gum. Not the end of the world. What I was more upset about was the fact that three of my newer shirts were ruined. Into the trash they went. I kept reminding myself that it was only three - it could have been much worse. And, ironically enough, none of Dan's work clothes ended up with the green, spearmint substance all over it. Not even residue in the pockets. How does that happen?

Dan felt horrible. The gum was all over the drum of the dryer. We had no idea how to even start removing it all. It was too late to call our parents for their sage advice. Dan decided to read the manual and see if there were any recommendations. Nothing. Then, he decided to call the 1-800 number on the manual. Surprisingly, someone answered on the other end despite it being pretty late at night. Dan fessed up to his mistake and asked if they knew any possible solutions.

Their recommendation? Rub ice on the gum, then use a non-metal object to scrape it off the drum.


We used an old, expired debit card that we still had lying around to do the scrapping with. Took a lot of elbow grease, but worked like a charm! 


Since it was late, we didn't bother to remove all of the gum right away. Instead, we took the clothes that were in the washer and hung them up in our bathroom to line dry (like we did when dryer went kaputs the first time).

Luckily, we weren't in a rush to do any laundry the next couple of days, so we let the dryer sit the way it was until Dan had a day off of work to scrap off all the gunk. He said he used about 8-10 ice cubes to do the entire drum. And that it didn't take quite as long as he thought it would. He was finished removing the gum before the towels finished in the washing machine.

We decided to run a load of towels through first because I figured it would be easier (and cheaper) to replace old towels than it would be to have to shop for, try on, and replace clothes. Results? No sticky, spearmint gum! We both breathed a sigh of relief!

Hopefully, none of you ever have this problem happen to you. But, if it does, keep calm! Nothing a some ice and a little bit of elbow grease won't solve. As for the clothes that may get ruined, remember: they're just clothes.

Anyone else have to scrap gum off of their machine? Or maybe it was something else left behind in the pockets of your loved ones? I'm think crayons would be a beast to remove from a dryer....

Thursday, April 25, 2013

Front Loaders

The last time I talked about our tiny laundry room, we added some wicker baskets from the thrift store for organization and it looked a little something like this:


About a month ago, our dryer went on the fritz. You might remember this Instagram picture of us drying our clothes in the master bathroom…

Well, that was only the beginning. Let me begin by saying that our dryer is OLD. The only good part about it? It was free - a wedding gift from my uncle - so we can’t really complain. But, after using it for over a year, it was starting to fall apart. It was getting louder and louder. I’d try scooting it on the floor thinking it was unlevel. Sometimes that would work, but most often it didn't.

Then, one night, the noise was so loud I swear all of our neighbors could hear it. It was this weird grinding noise, eerily similar to nails on a chalkboard. Well, at least the noise made me cringe like nails on a chalkboard do. I’m cringing now, just thinking about it… So, we stopped using the dryer. Instead, we’d wash our clothes in our apartment, then lug the wet clothes downstairs and to the complex clubhouse and use their dryers. Only their dryers were expensive! $1.50 for one load! And that one cycle didn't even dry our clothes out all the way. Luckily our roommate found a Laundromat in town that was much, much cheaper.

We really struggled with how we wanted to fix the situation. Try to fix it? Hire someone to come out and fix it? Buy another second-hand dryer on Craigslist? Or bite the bullet, upgrade, and buy new?
Being that our dryer was old and was second-hand, we didn't have the manual to it. Dan tried googling for the manual – and all he could come up with was a similar model. The prognosis? It was either one of two things. It could be the drum pads (I forget the technical term for these now…) were worn down and the drum was rubbing against metal as it rotated. Or it could be the ball bearing. We assumed it was the drum pads. So, Dan googled around some more to figure out how to get to the drum pads. After dinner one night, I walked over and saw this:

I don’t know why I was surprised that there was so little going on underneath, but it seemed pretty simple. Dan found the drum pads, discovered they were worn, then realized that the underside wasn't all that bad. So, all he did was flip them over. Ta da! He put everything back together and loaded up the dryer for a test spin. No noise! For about 10 minutes anyways….
So fixing it was out. We didn't feel like hiring someone to fix it – too much hassle. Next up: Craigslist. We searched all over Central Florida. Maybe we’re too picky, but we didn't see anything that we liked. And most people were asking $300+ for the set. All we wanted was the dryer. And paying even $100 for a used, beat up looking dryer just didn't sit right with us. Seemed like Craigslist wasn't going to be the right route for us either.
That weekend, we decided to shop around and price new washers and dryers. We figured if we were going to upgrade our dryer, we might as well upgrade the washer too so that they were the same models. Besides, we've been talking about upgrading them anyways once we move out of the apartment, so why not just go ahead and do it a few months early?

To say we experienced some sticker shock is an understatement. Who knew washers and dryers were so darn expensive?? It didn't help that we were drawn to the front loaders. And we preferred grey over white, red, or blue. I still can’t figure out why grey (not stainless steel, like in the picture above) cost so much more than any other color.
After having our bubbles burst, we revisited the idea of buying used. We stopped in the middle of our shopping trip to have some lunch and made a pros/cons list of buying new versus buying used. In the end we decided that buying new was the right route for us. There was only one more problem lying ahead of us: money.

Since going through Financial Peace University, Dan and I have always maintained a minimum $1,000 emergency fund in our savings. But we realized that a thousand dollars wasn't going to cover this appliance purchase. We didn't feel comfortable completely depleting it either. So that meant we needed to save up for them. That meant more nights spent at the Laundromat. No more eating out. No snowball payment on Dan’s car. Every penny we could pinch from our budget went towards our washer and dryer.
It took a month, but we did it! Two weekends ago we went out and bought our new washer and dryer. We bought white, LG front loaders (you can see them here and here - funny thing is, they're now priced $75 lower per model than they were when we purchased them!) from HHGregg. Why HHGregg? Well, they came recommended from some friends of ours. Plus, they shopped around online, found the cheapest price, and matched that price for us. We thought they had free haul away and delivery, but later found out that you had to pay for it up front and got a gift card later in the mail once you filled out the rebate paperwork. We hadn't budgeted for delivery…. which put us $50 over our max budget. We told the sales guy that it just wasn't going to work and that we’d be back in 2 weeks when we had more money in our account. He asked us to wait and talked to his manager. Not only did they chop off the $50 for us, but they took it down another $40 beyond that – and we still got the delivery rebates. Plus, when they were delivered, there was a scratch on the washer door, so we're suppose to get a $75 refund. At the end of it all, our final cost will be $1,610.21.
We had to wait a week for delivery, but they are here!

It’s honestly sad how excited we are about two large chunks of metal. I think what feels the best though was being able to save up for them and tell the sales guy he could keep his store credit card.


They both stick out past the door frame slightly, but it doesn't really bother us. The curtain that is normally hanging up in that doorway covers it all up. Unfortunately, the washer door opens in the wrong direction. But we're hoping that when we get our own place, it won't be a big deal. The only other change we had to make to the laundry room was to move the cats' litter box to another room. 

Oh, and I bought a yard of fabric from JoAnn's to cover the washer. Why? Well, we wanted to set all of our stuff on top of it (dryer sheets, loose change jar, etc.), but didn't want to risk scratching it up. My mom gave us a scrap piece of shelving liner to place underneath the fabric to keep it from sliding around. We talked about doing the same thing to the dryer, but we decided that we liked the dryer bare so that we can use it as a place to fold all of our clothes.


I went for something that had blues and greens in it. The fact that there was a brown stripe to match the curtain was pure coincidence! And for around $5, it's the perfect way to add a little bit of color and pattern to such a tiny room.

So there you have it, our new washer and dryer. We seriously couldn't be happier with the pair. It makes doing laundry seem less like a chore.

Wednesday, April 4, 2012

Laundry Room & Wicker Baskets

A little while ago, I mentioned that I wanted to overhaul our laundry room. I'm not sure if overhaul is the right word. But I definitely wanted to spruce it up a little bit and declutter the mess that had been sitting up on the shelves since moving day. And it's finally done!

Let me remind you what we were starting out with. On one side we had the lid to a litter box, some spray paint, hand-wash only clothing, laundry detergent bucket, bungee cords, and cleaning supplies.


On the other side, we had our stash of paper towels (you can never have too many of those, right??), distilled water, starch, an iron, more cleaning supplies, our toolbox - and that doesn't include all of the items resting on top of our dryer.


And if you looked into the laundry room from the kitchen, you would see our various brooms, duster, and swifter mop, our ironing board, and my aprons which hardly ever get used.


The first thing I did was take everything down from the shelves and figured out what needed to be trashed, what needed to stay, and what could be moved to another room. Some old cleaning supplies were trashed, but other than that, the majority of the stuff was staying. The only things that moved were the liter box lid (which went into our storage closet on our balcony) and the ironing supplies (I'll mention their new home in a moment.

So once that was taken care of, I went on the hunt for some baskets. I personally love the look of wicker baskets when they are used as storage, but the hubby hates them. The only reason he agreed to let me have wicker in the laundry room was because he reasoned that he'd hardly ever have to look at them. Woohoo! One small victory for wicker

My only dilemma? Wicker baskets cost a lot more than I wanted to spend. My goal was to do this little makeover for as little as possible. Over Spring Break, while the hubby and I were in Orlando, I asked him to stop at a couple of thrift stores my mom and I use to frequent. The main purpose was to look for a little cabinet/dresser/buffet to act like a bar in our dining room (kinda like this one from Katie's dining room). But while we were searching, I came across three little nesting baskets that were in perfect condition. And the price for all three? $8! You can't beat that! That's like the price of one small basket at Michael's or JoAnn's on sale.

So, thanks to my little baskets, the laundry room is looking much more organized these days. Ready for some after pictures?

This is what the laundry room looks like when you're standing in the kitchen. 


Please ignore all of the clutter on our fridge. There are still holiday photos up on our fridge along with wedding announcements, invitations, and thank you cards. I can't bring myself to take them down quite yet. 


I didn't do a whole lot when it came to the middle portion of the laundry room. The hooks stayed where they were at. And the little white laundry basket stayed put too. The only change was to add the brown rug to the floor which came from our guest bathroom.


The side that probably changed the most was the side that originally housed our toolbox and ironing supplies. Our toolbox is still there, but for the most part, everything else is gone.


On top of our dryer, we have a little trash can for lint and used dryer sheets. I used the smallest of the three baskets to house our Oxi Clean and our dryer sheets. The hubby was a little worried that by taking them out of their box they would lose their smell/function. But so far, they've been out of the box for a couple weeks now, and we haven't seen a difference. If anything, our laundry room smells much better now. I also decided to throw a flower pot on there as well to act as a coin catcher. We had a small jar on our island for a little while, but our change collection was outgrowing its home there and needed a bigger container. I think it works well. Tucked in the corner you'll see the handle to our steam mop. There really isn't an easy way to store that thing.... so, it stayed put where it was.


Up on the shelf, we still have our spray bottles hanging out. We keep the car stuff and the Shout in the laundry room. All of our other spray cleaners are under our kitchen sink - which I should probably add to my to-organize list. The dark brown box holds all of our hand-wash only items. Since we don't have that many, that basket is the perfect size. Plus, since we already had it on hand (we used it as our "card box" at our reception), it was free! The lighter box now holds our small - but growing - home improvement stuff. And then, of course, you have the toolbox.


Side Note: We recently bought one of those massive bottles of laundry detergent. Why? Well, the smaller size wasn't available that day. We had it sitting on top of our dryer and used the little dispenser and cup to get the soap into the washer. Well, I guess the left over detergent on the little cup dripped onto the top of our dryer. So, I grab an all natural spray cleaner to wipe everything up.

Problem! It not only discolored a portion of the dryer, but some of the paint also started to chip away. Ultimately, its not that noticeable. But, just wanted to save someone else from having something like this happen to them in case it happens in a larger proportion.


Above our washer we've got our paper towels and distilled water. I moved the laundry detergent up there as well (now I just make sure to thoroughly rinse the cup before reattaching it). We keep some extra clothes hangers in the laundry room for items that need to line dry. And I can't forget to mention the little pictures to the left that I showed you here.


This side got the largest of the three baskets. It became home to all of our other cleaning supplies - steam mop & swifter accessories.


So where did the ironing stuff end up?


In our guest bedroom slash office. I found this over-the-door organizer made specifically for all of your ironing supplies. It even has a little spot for a water spray bottle, but I thought it was the perfect place to tuck the cord.


The best part, we barely notice it. Usually the door to that room is open, so unless you're peeking behind the door, you won't even notice that it's there. The only problem that we've run into is the fact that our ironing board likes to open up on its own. So we're working on a way to keep it from opening until we're ready to use it.


The nicest part about having the ironing stuff in the guest bedroom? It gives the hubby a place to iron his clothes. (I hate to iron. I'm the type of girl that just throws her stuff into the dryer to de-wrinkle it). Before he would have to lug everything from the laundry room into the living room to iron his clothing. Now, he doesn't have to lug it anywhere else in the house.

The fact that our laundry room is finally organized brings a smile to my face. Now if only I could get the clothes to wash, dry, and fold themselves, I'd be set! I can't wait until we have our own little house so I can really personalize our laundry room with color, art work, and better looking shelving.

Anyone else been on an organizational kick? Where do you go to score great deals on baskets and containers to tuck away all of your clutter?

LinkWithin

Related Posts Plugin for WordPress, Blogger...