Welcome to all of the first time visitors who are here thanks to the Pinterest Challenge!
I'm really excited that I managed to kill two birds with one stone. How so? Well, not only did I test out a recipe from Pinterest for the Pinterest Challenge, but it also qualifies as one of my Recipe Resolutions. Some might call this cheating. I call it working smarter!
If you remember, one of my
New Years Resolutions was to learn how to cook more things. Not only that, but to
taste everything I make - which is a difficult thing for a picky eater like me. So each month, I've decided to make one new recipe (you can see my first two recipes
here and
here) that sounds good to both me and the hubby.
THE RECIPE
THE PROCESS
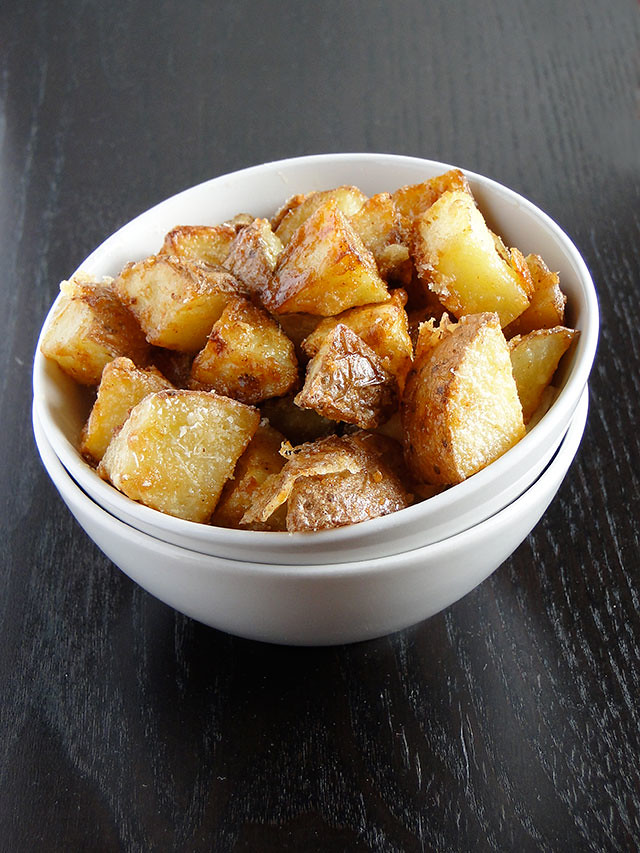
Step One: Gather your ingredients. We decided to use some of our left over shredded Parmesan cheese from our
roasted potatoes.
Step two: Start heating your panini press (or pan on the stove). While that's heating up, start buttering the slices of bread.
We noticed once we got cooking that we needed to turn the heat up a little bit more. That, and the hubby had it set to "griddle" instead of "grill."
Step three: Create your sandwich. Our layers were mozzarella cheese, Italian seasoning, pepperoni, Parmesan cheese, mozzarella cheese. Once we tested one sandwich, the hubby came up with the idea to add some of the seasoning to the buttered sides of the bread.
You might want to make sure you have extras on hand for anyone who wants to snack...
Step four: Place your sandwich on the panini press and wait for the cheese to become melted and gooey.
Step five: Enjoy!
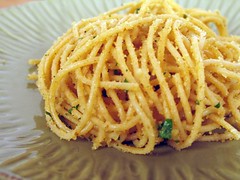
MY THOUGHTS
First of all, our sandwiches came out a lot more wimpy looking compared to the inspiration pictures... Maybe it's because our panini press smushed them down more?
If I'm going to be honest, I wasn't a fan. In theory, this sounded amazing. But once it was actually created, it didn't have as much flavor as I had anticipated. I think it has to do with the mozzarella cheese. Mozzarella is, in my opinion, a pretty bland cheese. It's great on pizza, but I think that's because the oven helps to crisp it, whereas it doesn't get that when laying between two slices of bread.
Also, I only put one layer of pepperoni on my sandwich, which didn't give a lot of flavor. But when the hubby layered more on his, it created a greasy mess (you can see the grease from his sandwich in the photo above).
I should also mention that the original recipe suggests that you dip the sandwich in pizza sauce. We opted not to do that because neither one of us are big fans of marinara sauce. Maybe that helps add flavor?
So, would I do it again? Probably. Why? Because the hubby really liked changing things up. I think next time I'll just use plain American cheese instead of the mozzarella. On the positive, it's cheaper that way! Also, we talked about using a different kind of butter to make the sandwiches. Our local Winn Dixie has this garlic bread spread that you use to make your own garlic bread at home. We think it might add a lot more flavor to the grilled cheese.
THE HUBBY'S THOUGHTS
The sandwich was good. Especially when we added the Italian seasoning to the bread - added more flavoring. Would really like to figure out ways to add more flavor overall to the sandwich. Oh, and 3 pepperonis is way too much! And don't forget to double check the settings on the panini press before you start.
So there you have it folks! One more recipe down. Only 9 more to go! Any recommendations to make this sandwich more flavorful? What sort of things do you like to add to your grilled cheese.
I'm linking this recipe up to the Pinterest Challenge: Winter Edition which is being hosted by these four lovely ladies.
Also, at the bottom of each of their posts are a TON of links to other amazing Pinterest Challenge projects and creations.
You can find all of my Pinterest boards
here. Leave a link to your Pinterest account or your challenge project below - I'd love to check it out!