Showing posts with label Classroom. Show all posts

Wednesday, August 6, 2014

Classroom Tour (Round Three)

The past couple of years I've shared photos of my high school classroom (which you can see here and here), and I thought, why break the tradition now? 

I didn't change a whole lot this time around. Everything was working pretty well at the end of last school year, so I set the room back up in the same configuration. Since the last classroom tour, I lost two of my bookshelves and gained one large bookshelf in return.


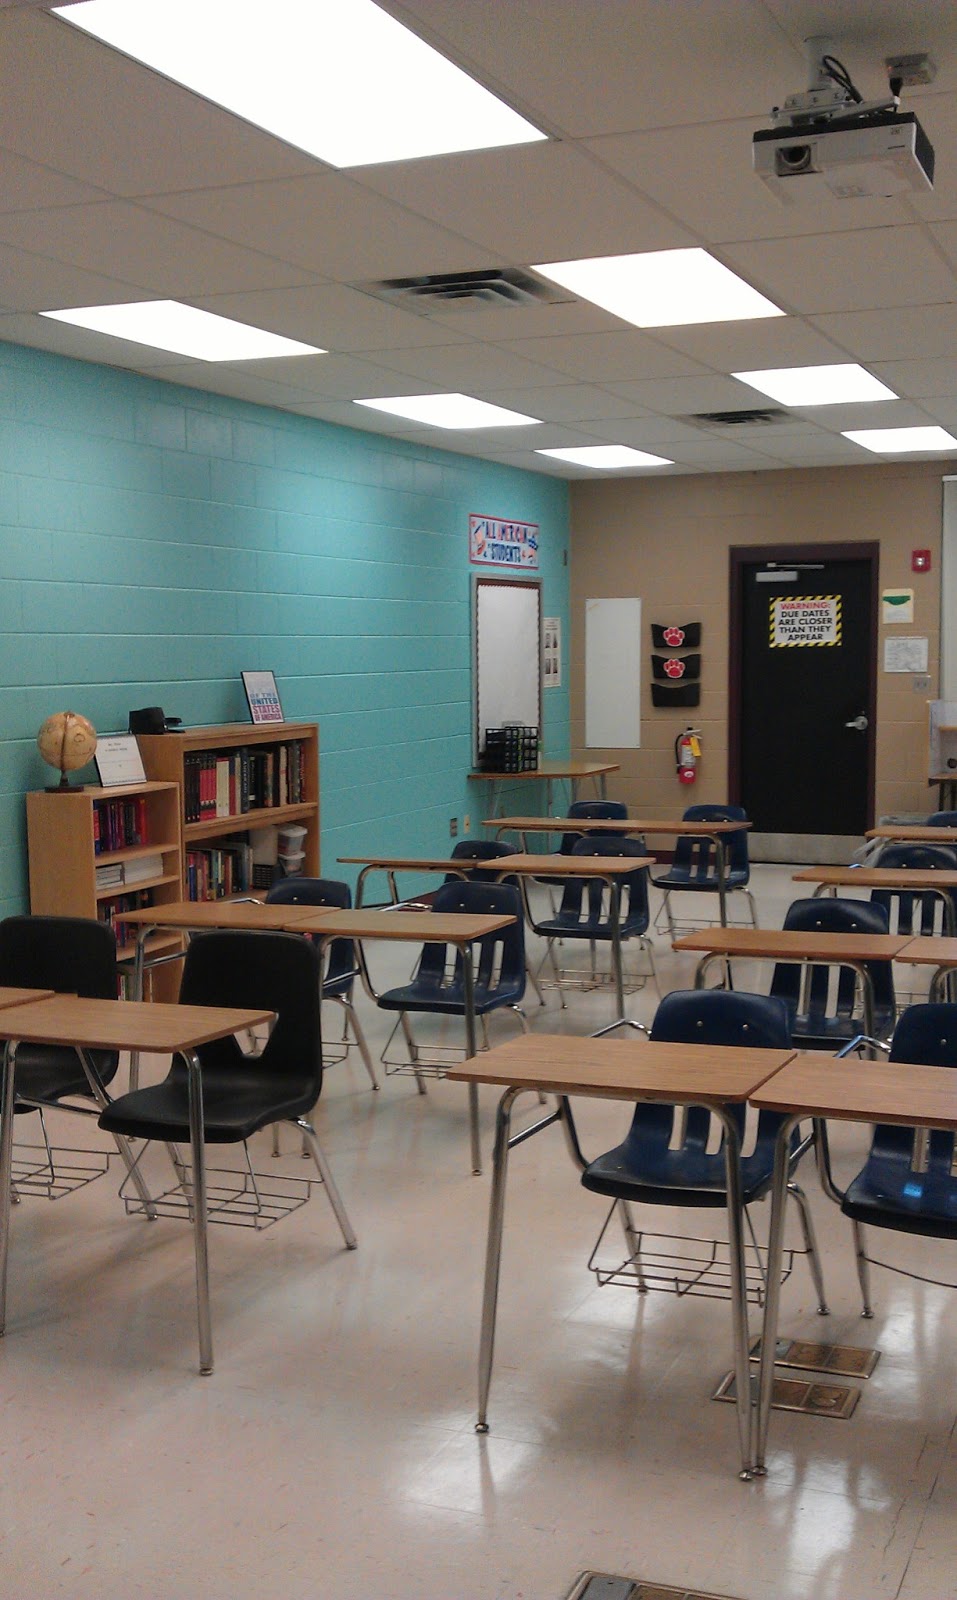
That shelf got moved from the middle of the room to the front of the room (was tired of kids leaving drinks/food/phones on my shelves). I really like having everything condensed into one unit.

I also gained a small tabletop podium and inherited a round table. Although I tend to move around the room when I lecture, I like having a spot to lay out papers each day. And, it gives students a spot to stand when giving presentations.

The majority of the changes in my classroom revolve around my desk.


In the past, I've had my two desks connected and had to walk around them to access my computer. This time, I've separated them and added my filing cabinet to the mix. I'm not exactly thrilled that my desk blocks some of the white board, but I typically only use that side for announcements, so hopefully it won't become too much of an issue.

The large desk is where I like to spread everything out.


I like to keep a couple of binders on my desk that I use frequently: seating chart/grade book, junior class sponsor information, and FFEA sponsor information. The magazine holder has color coded folders that hold makeup tests and assignments when students are absent. The little basket in front of all of that holds my remotes and other techy stuff. The wood box has a bunch of dry erase markers that were picked up at a yard sale. Then, of course, are the two textbooks for each course that I teach. On top of them are the things I'm currently working on with each particular course. The black bins are where students turn in their work. And the striped folder is my "to be copied" folder that I use to take papers up to the office.

The remnants of my bookshelf are still holding in there...


I think this might be the last year for this guy. It's barely standing - having to lean on both walls to keep straight. But, it works for now. It holds all of my binders that I use to file back parent contact information, financial information, and curriculum resources.

I added some more picture frames to the mix last year. Updated some of the photos of our nieces and nephews (will they stop growing already?!) and added a pic of the Hubby from our trip to Savannah last summer. Decided to frame my teaching certificate and display it with my college diplomas. It drives me crazy that the frames on the wall aren't centered over the bookshelf, but my back is to it most of the time, so I don't think about it too much.

The biggest change for me is my computer table.


It's a little on the small side, but it gets the job done. We moved my filing cabinet beside the table for a little extra space to put my lamp, stapler, tape dispenser, and fan. Still not sure what I'm going to put inside the cabinet yet, but I might move some of my writing supplies out of the larger desk and into that top drawer for easy access.


Like I said, its a little on the small side, but I find that when I have a smaller space to work with I tend to keep it more organized. There's just enough space for my work calendar and a notebook to jot things down on. The two photos of me and the Hubby are there to keep me sane :)  The computer monitor is on top of a filing system that I use to keep disciplinary slips, post-it notes, CDs/DVDs, etc. There's also a small blue cup that holds all of my paper clips attached to it. To the right of the monitor is my document camera. I don't use it as often as I use to, but it's nice to have for those few occasions when I do use it.

My printer and computer tower are still in the same spot. Some might think its weird or inconvenient to have a printer right at your feet, but honestly, it doesn't bug me. Sometimes I even use it as a foot rest (shh! don't tell our tech department!). The thing that makes me most happy? The fact that all the cords are corralled into a basket!


Even though they still aren't pretty to look at, at least it's not rat nest it was before. The Hubby came out to the school one day and organized all of cords. Even though I'm totally capable of hooking up my own computer, I still prefer for him to come out and do it for me. When I do it, I just let the cords lay where they fall. When he does it, he makes a point to wrap up the excess cords and zip tie them together. I picked up the basket for $1 at Target, and thought I could attach it directly under the desk. Didn't exactly think about how I was going to do that. So until I figure that piece of the puzzle out, the basket is resting nicely on top of the computer tower.
 
You may have noticed in the picture above that my college wall has expanded since the start of last school year! Here's a before:


And this is what it's looking like now:


I've added quite a few more pennants and magnets in a poor attempt to cover my a/c system to my college wall! Whenever I visit a new college or town, I try to make it a point to stop by the bookstore and pick one up. It's sorta becoming my "thing." Some people collect fridge magnets. Others shot glasses. Me? Christmas ornaments and college pennants.

The USF Bulls pennant was picked up while in Tampa for an AP Summer Institute. Funny story: the college kid working at the bookstore asked if they could help me find something. I told them I was looking for a pennant, and they had absolutely no idea what I was talking about. The three smaller ones - Ole Miss, Texas, and Florida State - I picked up at a local flea market for a few bucks. Which reminds me that I need to go back and see if they have more!

I've started to realize that pennants are expensive! So, when I can't find one that I like for the right price, I try to buy a small magnet from that college to help fill in the gaps on the wall. My parents picked up the Indiana and Kentucky magnets; I bought the Georgia College magnet while visiting for my Papa's funeral; and the Florida Gator magnet was a gift from another teacher.

Still, my favorite part about my classroom is the painted map.


That's pretty much it for this year's classroom tour. I'm still trying to figure out how I want the student desks configured. Rows? Paired? Groups? Circled? Half and half? I better figure it out soon though. Students come back tomorrow! It's crazy how quickly summer flies by!

Any other teachers out there working on putting their rooms together? Or are you still soaking up the summer sun and refusing to think about work? That was me up until last week!

Here's to another school year!


Thursday, June 12, 2014

Better Late Than Never

So, as I was writing about the updates in my classroom nearly a year ago, I realized I never shared the "how-to" on my wall map that was painted a couple summers ago. I started writing this post, and was holding onto it thinking that I would save it for the next "Pinterest Challenge," which you can read more about here, here, here, and even here. But, one was never announced, so this post has been sitting in my draft folder for quite some time now, and I figured it was finally time to go ahead and it "Publish." 

I mentioned that I was starting the project, even shared the final product, but never really explained in detail the whole process. Granted, it's a simple process, and I really didn't take many photos along the way, but I still wanted to share in case there was someone else out there who wanted to attempt something similar. 

The first step in the process is to figure out what you want on your wall. I searched Pinterest for a map that had easy lines on it. As much as I love barrier islands, those seemed a little too tedious to paint. I settled on this map. Straight lines. Perfect!

Then, I rummaged through my supply closet and found some transparency films that my mom had salvaged from an old house. I printed the map onto the transparency film. The next task? Finding an overhead projector. Luckily, I knew that the math department had a couple stored away in a closet (perks of being the only social studies teacher in the math building) and said closet was unlocked over the summer.

At this point I bet you know where this is going, huh? Place transparency on projector. Hook up to electricity. Center it on your wall and get it to the desired size. Grab pencil. Trace.


I thought about adding a "You are Here" star on my map, but decided against it. If my students didn't know where Florida was on a map, we had bigger problems to deal with....

Once everything was traced, I returned the projector to the math closet and got busy deciding which states would be which color. I had bought 5 different colors of pre-mixed paint in quart size containers. Red, yellow, green, grey, and blue. I wrote the name of the color inside each state. Then I grabbed my brush and started painting.


These were both taken after 1 coat of paint. The grey covered much nicer than the red and the green. Probably because the grey was satin and the other colors were semi-gloss. Learn from my mistakes - don't use semi-gloss paint. Oh, and ignore that weird line going down through Montana and Wyoming; there was an adhesive strip that I still needed to remove.


I did the entire first coat by myself. Got a little messy in the process, but that's the fun part! A couple days later my mom came out and helped me paint the remaining coats on the map. It was nice to have an extra set of hands because we could tackle two colors at once.

The finished product:


Some other things that should be mentioned:

  • I used a black sharpie marker to draw the dashed lines around Alaska and Hawaii
  • You can still see the pencil outlines around the yellow states if you look hard enough.
  • You can still see the word "yellow" in the yellow states if you look hard enough.
  • I really shouldn't have painted Michigan blue; some students think it is the lakes and not the state itself. I have to remind them that there are five Great Lakes, not two. (And, yes, I teach high school juniors....)
As you saw in my most recent classroom tour, all of the walls got a fresh coat of paint, including the white around the map. I also added a border around the map to give it a more finished look.


Overall, I'm in love with my map! And the students love it too. It really has been helpful in getting the kids to understand where things in history are happening and not just the what and the who.

Tuesday, July 30, 2013

Simple Paint Storage

I wanted to share a quick and easy storage solution for any leftover paint you might have lying around your place. 

After the paint crew finished painting my classroom, I was left with two messy looking gallon containers. I didn't feel like leaving them in my classroom storage closet, so I brought them home with me. The only problem is that we have pretty much run out of storage space in our apartment, so finding room for two gallons of paint plus all the supplies we had purchased was proving difficult. Not to mention, it seemed silly to keep such large containers when the majority of the paint was gone. 


So, I turned to Google and Pinterest for ideas on how to store paint.  My favorites were these two:


I loved the first because it was simple and streamlined. Plus, it seemed like something Dan would approve of. The second option was my favorite in terms of style - mason jars & pretty color labels. And, the jars would be easier to use for quick touch ups.

The Hubby and I went out shopping to price both options. We found quart sized empty paint cans at our local Lowe's for $2.97 a piece. Although the price was right, I was still holding out for cute mason jars. So, off to Wal-Mart we went. After searching all over, we finally found the canning supply section. For under $10, we could get 12 quart sized mason jars. Can't beat that price!

But, as Dan reminded me, we didn't need twelve - we only needed two. What were we going to do with the other ten? And where were we going to store the rest of them? Sure, it's cheaper per jar, but it doesn't make much sense to spend more on them if we're not going to use them. Besides, when it comes time to move, do we really need to worry about glass jars full of paint? Grrr... I hate it when he uses logic to talk me back to reality.

So.... back to Lowe's we went and picked up two quart sized empty paint cans. Once we got home, I transferred all of the paint to its new home. I also labeled each can so that if we ever needed more of the paint, we'd know what to buy.


The labels were $2 from Wal-Mart. I could have made labels nicer/cuter using the computer, but I didn't feel like fiddling with the printer and getting the settings just right. I wrote down the information from the paint swatch as well as the base paint that was used; we've never had to buy more of the same color before, so we were sure what information would prove useful. Oh, and in case you're wondering, I just used my finger to make the little paint dots on each of the labels. Others recommended using a q-tip, but I didn't mind getting a little paint on me.

So, that was our quick and easy solution to storing our paint. Now, the cans fit nicely inside of a copy paper box with all of the other quart size cans we've collected (chalkboard paint, primer, etc.).

How do you store your leftover paint? Do you transfer them all into smaller containers or leave them in the originals?

Monday, July 29, 2013

Another Summer Gone


Today's my last day of summer. Tonight is the school's annual back-to-school dinner. And tomorrow it's back to faculty meetings and lesson planning. Luckily, I have my classroom ready to go and the first two weeks of lesson planning done for one of my two preps. Even though I've managed to accomplish quite a bit before the first day back, my to-do list is still pretty daunting. 


Every year (or at least for the past 3 years I've been teaching) in one of our early faculty meetings, our principal tells us that if we aren't excited about the first day of school and meeting our new batch of students, we might need to start rethinking our career choice. And he's right. After having the summer off (for the most part) and planning out all the changes for the upcoming year, I don't know what teacher wouldn't be excited about the new year. Sure, after a little while that excitement wears off and teachers are looking forward to the holiday breaks. But ultimately it comes down to doing something that you love to do.

So, although I'm not looking forward to waking up early tomorrow or a week of faculty meetings, I can't wait to see what the year holds!

Wednesday, July 24, 2013

Classroom Tour (Round Two)

Last year I gave a little tour of my classroom at the start of the school year. But a lot has changed over the summer, so here we are again for Round Two. If you follow me on Instagram, you've already gotten a sneak peek.

First, let's take a quick 360 degree look at the classroom:


The first major change that you'll notice is the fact that the walls are painted! I've been dreaming of painting the walls since last summer. I even had some of my students brainstorm colors and ideas with me at the end of last year. Originally, the plan was to go with a red, white, & navy blue scheme to tie into the fact that all I teach is US History. The walls were going to be navy and there was going to be a red timeline around the top with white lettering. My students were so excited, some of them even offered to come in and help me paint over the summer.

The problem? I didn't realize how expensive paint was! And considering I had over 700 square feet to paint, and it was going to need at least two coats, I was looking at over $120 in paint alone. No way was I going to pay that much for paint. As I started walking out of the paint department with my painting hopes shattered, I saw the collection of whoopsie paint.


To my surprise, there were two gallons of the exact same color marked down from $35 to $5 a gallon! Plus, there were two quarts of tan marked down from $11 to $2.50 each. We talked to the guy at the paint counter and asked him if he thought this paint would cover all the walls. Gave him the square footage. Described the walls and what condition they were in. He said it'd be close. Since it was paint+primer, he said the coverage would be good. Probably only need one coat. But, he recommended using a primer and going over the scuff marks and any other imperfections along the walls. 

Luckily, the blue paint (which looks most like the image on the right) was a stock color called Bay Mist by Valspar, so if we ran out, it wouldn't be that hard to color match it later. And the tan color was only going to go on one wall, so we figured half a gallon was plenty.

The Hubby and I headed over to the school the next day and started prepping the walls. We taped off everything and primed over what needed to be primed. We also did a test spot on the walls to see how the colors would look.


My janitor (the same one we went geocaching with) came and saw what we were doing and suggested we talk to the paint crew that was on campus - although they were busy painting the outside of all the buildings, they were looking for inside work to do when the rain came. So, I talked with the supervisor, showed him what I was planning, and he said they'd have it done in about a week.

I stopped by a few days later to drop off some stuff and was told that the tan color we had picked up turned out to be two different tans. They had already cut in with the darker tan, so there was no way to mix the two to create the same color. The other dilemma? There wasn't enough of the blue paint to do the back wall. So back to Lowe's I went and picked up a gallon of tan paint. I picked out a color swatch that was slightly darker than the tans that were already on the wall to make sure it covered well. I picked out Faint Maple, again by Valspar. Twenty-eight dollars later, we had all the paint needed to finish the room. I also was able to talk the crew into painting my classroom door black using paint they already had on hand.

I am so happy with the new color! It makes the classroom so much more inviting. No more sterile white. Anyways... back to the tour! This is the view you see when you first walk in:


You'll notice that I finally got that extra white board installed last year. I used it mainly for assignments, homework, and announcements. Beside that is an extra table. Not sure what I'll do with it yet. I might let the students use it as a charging station for their phones and iPads. Above that table are 4 writing tips posters that I've had in storage for the last couple of years.


Also, the door to the mechanical closet was left open, so there is a little glimpse into a room I'm normally not allowed to go into. And my tiny TV on a cart is still hanging around. As soon as the door to the closet is shut, I plan on sticking the TV right in that corner so that it's out of the way.


I had to change out the bookshelves for my classroom library; my tall 5-shelf bookcase toppled over and fell apart when they moved it to re-wax my floors. So, the large 3-shelf one from behind my desk is now for the students to use. Flashcards, markers, crayons, pencil sharpener, stapler, globe - all there for the students to use. I also put my "Mrs. C is currently reading ________ by _________" frame (inspired by this) up there along with some subway art I printed off the internet.

The wall above and beside the library is a little blank. But, I'm hoping to fill it in with student work as the year progresses.

If you look to the left when you first walk in, you'll see this:


I took down the red/blue bulletin boards and replaced them with something a lot more simple to go with the new paint colors. I bought a roll of bulletin board paper and three packs of brown border from a teaching supply store near Altamonte Springs.

Also, I've arranged the student desks into groups of two this year. I'm hoping to incorporate a lot more collaboration into my lesson plans, so this seating arrangement will help with that.

My desk is in the same location as it was last year (Hubby not included). Just did a little rearranging of where the computer sits. By having it closer to the wall, it allows me to see more of the classroom from where I'm sitting. Plus, it gives me the larger desk to spread out everything I'm working on.


Remember that 5-shelf bookcase that toppled over? Well, my janitor was able to save part of it. So, I moved that behind my desk to hold all of my binders and teaching resources. It also gives me a place to display some family photos. You'll notice that I hung up my college diplomas. Its my first time using 3M strips to hang anything, so we'll see if the frames are still up on the wall when I go back next week. Fingers crossed!


I also brought our small filing cabinet from home and set it up behind my desk. Its the perfect spot for my document camera. Eventually, I'm hoping to move some of my more frequently used files into those drawers.

To the right of my bookshelf is the door to my storage closet. I snapped a couple of photos to share, so here's a quick look inside of there:


It holds resource books for the textbooks I'm currently working with along with the resources from our previous textbook adoption. I keep extra school supplies and old student projects back there too. My microwave and fridge (both gifts from my folks) are back there along with my large filing cabinet and all of my movies.

Looking towards the back of the room:


The bulletin board is for hanging student work. The baskets on the table are for returning student work. On the wall are baskets that I keep magazines in along with my emergency evacuation folder (which holds our evacuation route along with a roster for each of my classes). The white board is used to announce upcoming events and tape up flyers.


To the right are the windows, a/c unit and painted wall map. In the window is a poster with my name, where I went to college, and the degrees I received. It's part of a school wide effort to create a college-going culture. To help with that culture, I thought it'd be fitting to include a UCF poster below my name poster.

Keeping with the college-going culture, I decided to cover up my a/c unit by hanging up college pennants (inspiration here and here). I had three already in my storage closet. I picked up two more on our recent trip to Savannah and added a UF pennant (which nearly killed me to buy, by the way) after the college tour I helped chaperone this summer. All it took was a little tacky glue (left over from this project) and some magnets my mom picked up at a yard sale. I'm thinking of adding a sign to the top like this.

But my favorite part of my classroom is my map!


I realized that I never shared the whole process on how I made the map, so I'm planning on writing up a post about that soon. Anyways, even though the paint crew painted all of the walls, we asked them not to paint around the map. Dan and I touched up all of the white paint and added a border around the map to match the rest of the bulletin boards around the room.

So that's it. That's my classroom. I'm so excited that my room is already organized before the school year even starts. There's less than a week left in my summer vacation before preplanning begins. But going back with this already checked off the to-do list is amazing!

Before I go, I wanted to say a big thank you to Dan for spending his days off with me getting my classroom organized! He helped me do the things that I'm too short to do and got my computer all hooked up and ready to go. That, and he kept me sane through the whole process, which isn't always an easy task. Love you hun!


Wednesday, August 15, 2012

Classroom Tour

I'm finally back with a tour of my classroom. I think I'm finally starting to get a rhythm going in terms of balancing lesson planning, grading papers, reading my devotional, and being a wife to my husband. Now I'm trying to see if I can fit blogging into the mix. Fingers crossed it goes well so I can keep connecting with all of you!

So, let's start with what you see when you first walk in through the door...


The first thing you notice is that I have a long and narrow classroom. I can fit a row of 8 desks, back to back, and still have plenty of room to walk in the front and back of the classroom. It might be a little hard to read the projector screen all the way in the front of the room 8 seats back, so I try to keep it to 5 seats per row.

You'll notice I have very little board space. Considering my projector screen is down probably 95% of the time, I only have the sides to work with. And one side I've taken up with my agenda/homework for the week. I used basic painters tape to outline that since I know it won't damage the white board.

The white poster on the right wall is a learning map. I'm required to have it up in my room. Honestly though, you can't really read it because of the glare. But, I just do what I'm told.

The door to the right leads to my neighboring classroom. I'm located in the math building. Seriously. I'm the only non-math teacher in the building. Well, unless you count the P.E. coach who does have a physical classroom. But she's never in there, so I don't count that.

Let's take a closer look at that corner...


The first thing that stands out (besides the crazy blue painters tape) is the itty bitty TV set. I seriously, no joke, have the same TV in the guest bedroom at home. I've had that TV since I was probably 10 years old. The only function this TV serves is for the morning announcements. And even then, the kids in the back can't really see it anyways. So we mainly just "listen" to the announcements.

Beneath the TV is all the supplies I allow my students to use. Markers, crayons, colored pencils, scissors, dry erase boards... all there. I use the dry erase boards for when we play Jeopardy review games.

The table has my "return basket" along with a hole puncher, stapler, and pencil sharpener for the kids. I also have a "no name" bin for all the kids who still, at the age of 17, can't remember forget to write their name on their paper.

The wall above the table is really bare. I was hoping that they were going to install a second white board over the summer along that wall. But, as you can see, it didn't happen. I might resort to hanging up all the presidents' pictures again just to fill that blank space. We'll see.

Oh, and that door that's partially covered by the TV? Yeah, that's the communication closet for the entire building, plus the two new portables out back. Yep. So whenever there's any issues with computers, the intercom system, or the fire alarm, I have 3-4 men in and out of my room trying to fix the problem. That's always fun.

The next view is also from the doorway, just looking towards the left side of the room...


You can see I've split my desks up into three separate groups. So far I'm liking it. But, I've been known to change up the seating arrangement more than once in a semester. You can see a sneak peak of my finished map along the left wall (which I'll give you a close up of in a second...patience!). And my desk is all the way in the front corner. Oh, and I can't forget the door on the left wall. Yep, that's a door to yet another math neighbor. It's basically like a history sandwich with math as the bread...


My desk. I've got a pretty standard teacher's desk. Nothing special. I really hate the look of the desk. I tried to dress it up a little bit with a poster from my Alma Mater. But I don't think it's really working. The black of the poster is blending in with the brown of the desk. I've thought about wrapping it in butcher paper (seen here), but not sure which color I want to go with... I feel like it's my space, so I'd like to do it in black & gold (Go Knights!), but afraid that gold paper might look weird with all the other colors going on in the room.

Speaking of colors, I decided to go with a red & blue theme this year for my bulletin boards. I only have two boards (one you can see above, the other is by the door), so I alternated the colors & borders. I figured red & blue were patriotic, and since I only teach American History, I figured it was pretty fitting. I mean, why not?

I used cheap, plastic table cloths from Wal-Mart as my "paper." My red bulletin board (pictured below) has had the same table cloth for 3 years now, and hasn't faded one bit! I think I paid less than a dollar for each table cloth.

One side of the bulletin board belongs to me and the other side is for the students. I have a calendar up there for them. I try to keep up with birthdays and sporting events on the calendar. 

The stool was a yard sale find from a few years ago. When my feet are tired at the end of the day I'm usually sitting on the stool and lecturing. And those weird things on the floor? They're electrical outlets. My room use to be a computer lab, so they needed outlets everywhere. Now they're practically useless because they've been waxed over.

On my desk is where students turn in their assignments/homework. I'm finding it easier to have these baskets on my desk - their work is right at my finger tips rather than all the way in the back of the room (where the baskets were last year). I'm hoping that having these baskets right in front of my eyes will help motivate me to clear the basket quicker. I hate a messy desk!

The door behind my desk leads to my storage closet. It's kinda nice - a storage closet all to myself. I keep my fridge and microwave in there along with extra books and supplies.

Before I share another view of my desk, I wanted to share my favorite poster in my room...


I love it! Our school has a "no cellphone" policy while students are in class. They are allowed to use their phones during lunch and in the hallways, but once they enter a classroom building, they are to be silenced and out of sight. If a teacher sees a student with their cell phone out during class, the cell phone gets taken away until the end of the school day and the student will get one day of in-school suspension. Sounds harsh, but let me tell you, it works! I rarely have cell phone issues in my classroom.

Anyways, back to my desk...


Behind my desk I have a bookshelf that holds all of my binders and teacher resources. It also has a couple of pictures of the niece and nephews. There are two plants that I'm hoping will last most of the year - they were birthday gifts from my aunt. But I don't really have a green thumb. They've last almost 2 weeks now though, so I'm feeling confident. I hope I haven't jinxed myself! I also have a volunteer award from a couple of years ago up there too. You might even be able to spot my large, red clothespin that my mom gave me two weeks ago. 

The two baskets is my "to be filed" system. Stuff for my standard classes go on top, and stuff for my AP classes (which won't start until January) go in the bottom basket. Then I take them to my filing cabinet to be sorted. The filing cabinet is located in my storage room.

The yellow paper you see there on the edge of my desk is something new I'm trying out this year. I'm calling it "Homework Pardons." You can see where I got the inspiration for them here

Here's my view of the class from my seat...


I hate that you can see all the cords! I need to come up with a better way of hiding them. Maybe I'll wrap paper or fabric around the printer table? Who knows...

Anyways, speaking of printer table, I have my own printer, which is a luxury - part of the perks of being the only one from the Social Studies department in a Math building. My doc cam also finds its home on the printer table along with some speakers and my electric stapler. Trust me, if your school quits stapling your copies, you're going to want one of these. Definitely worth the investment!

On my desk I keep a couple of pictures of me and they hubby - one from our wedding day and one from high school. I also keep various folders and my main binder on my desk at all times. One of these days I might detail my filing/organization. Maybe. I don't feel like its all that spectacular.

Alright, let's start moving our way back to the classroom door. We'll head towards the left...


In the back corner is my a/c unit. It ain't pretty, but I'm grateful to have my own a/c unit. On the table are the kiddos' workbooks that I haven't found a home for yet. And then, of course, is my favorite part of my room - the map!


Isn't she pretty? Yes, the map is a "she." It took us the good part of 2 days to get it all done. Even so, I still feel like the red states could use another coat. I guess I should have bought something other than glossy paint... oh well. Live and learn, right? What I love most about it is the fact that it's so large! Every student can see the map from every part of the classroom. 

I'll come back one of these days and write up a post on how I did the map, though I'm sure you could easily guess. Maybe I'll save that for my next pinterest challenge post (since that is where the idea came from)

And, the last stop on the tour....


...back at the door. By the door is my classroom library. Two bookshelves is all it takes. I found some fun quotes from Pinterest, printed them out, and placed them in frames. I also made a "Mrs. C is currently reading __________ by ________." frame - all I need is a dry erase marker to fill it in.

The bulletin board holds current student work. It's another thing I'm required to do. Below that is a bookshelf-turned-bench. My mom bought it at a yard sale and passed it onto me. Some guy turned it into a window seat. It came with cushions, but they need to be recovered before I bring them into my room.

My door needs to be painted. Maybe a project for next year? Another teacher told me that she used chalkboard paint on her door. Great idea - will have to check back with her at the end of the year to see how it held up. The hubby suggested using white board paint since I already use dry erase markers - might be expensive, but definitely worth consideration. I'm also thinking about painting the walls this summer. Kinda getting sick of all the white. 

The table is there for students who need to make up a test, or for students who get sent to my room by other teachers. I only have two windows in my room, one of which is an emergency exit, which for the most part have to remain unblocked.

But, there you have it, my classroom. I feel like it's definitely still a work in progress. Right now it serves its purpose, but I want it to evolve into a learning environment. I guess that just takes some time.

So, what do you think? What was your favorite part of your classrooms growing up? 

LinkWithin

Related Posts Plugin for WordPress, Blogger...